
How To Change System Drive for App Installation on Windows 11
How To Change System Drive for App Installation on Windows 11? Installing apps, and downloading images, documents, videos, audio, or any other content on a separate drive in Windows 11 can help in freeing up space on your system drive, improve the performance of your computer, and make it easier to manage and organize your data. In this blog, we will walk you through the process of installing apps, and downloading or saving content (e.g. photos, video, audio or anything else) on a separate drive on Windows 11.
Before we start, it’s important to note that you need to have an additional hard drive or partition set up on your computer to install apps on it. If you don’t have one, you can create a new partition by following these steps:
Steps to Create New Partition in Windows 11
- Right-click on the Windows logo in the bottom left corner of the screen and select “File Explorer.”
- Right-click on “This PC” and select “Manage.”
- Click on “Disk Management” from the left panel.
- Locate the drive or partition you want to use for installing apps and right-click on it.
- Select “New Simple Volume” and follow the on-screen instructions to create a new partition.
| Check Our Sponsor |
|---|
| Sponsored – Advertisement – Promoted |
|---|
Video on How To Change The Default Location For New Content on Windows 11
Steps To Change The Drive Location for New Content on Windows 11
- From your desktop home screen, go to the search option and search for “Settings” or you can simply go to the Settings of Windows 11

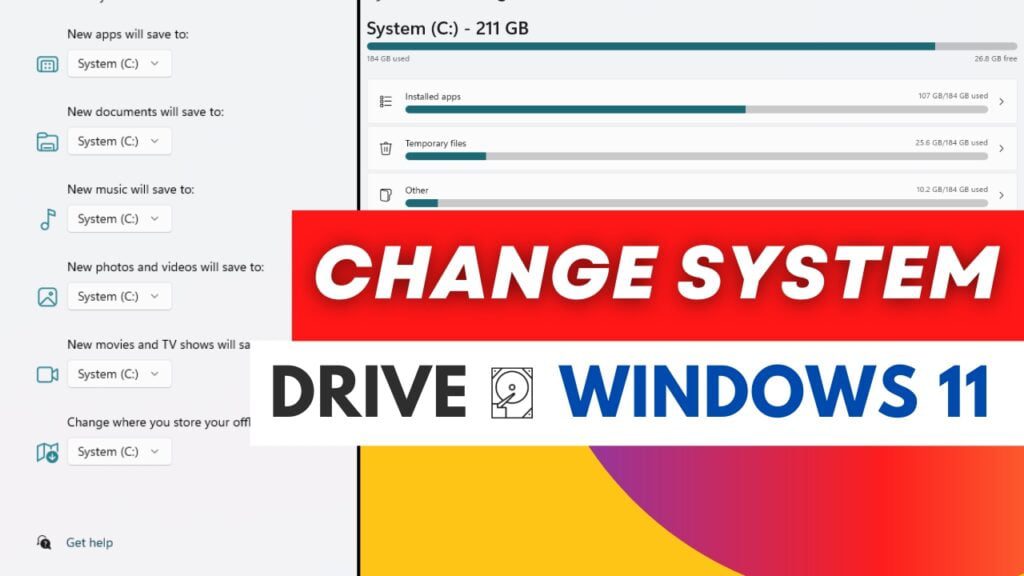
- From the settings menu, look for the “Storage” option from the list. You can see the mark in the below picture.

- Now scroll down and go to “Advanced storage settings” as marked in the below picture.

- Now from the drop-down list, click on “Where new content is saved” as shown in the below picture

- Now you can make the required changes according to you to change the location for new apps, images, videos, documents, and all that.

I hope now you are able to change the location of the new app, image, video, or file. So you can change the System drive to any other drive where you want to save or install apps. This will save space for your System drive and make your system faster. It will also help you keep things optimized and organized so you can manage them hassle-free.
It’s important to note that moving apps to a separate drive can affect their performance, as accessing data from a different drive can be slower than accessing it from the system drive. However, this can be mitigated by using a solid-state drive (SSD) as a separate drive, as it has faster read and write speeds than a traditional hard disk drive (HDD).
Know what are the differences between HDD and SSD
| Check Our Sponsor |
|---|
| Sponsored – Advertisement – Promoted |
|---|
Final Words
In conclusion, I hope this article will help you change the default drive of the app, images, files, audio, and documents for windows 11 to a different drive where you want to save or install a new app. This will no doubt save memory for your System drive so that you can install more important apps on the System drive. By following the steps outlined in this article, you can easily change the default drive in Windows 11 and enjoy all the benefits that come with it.
